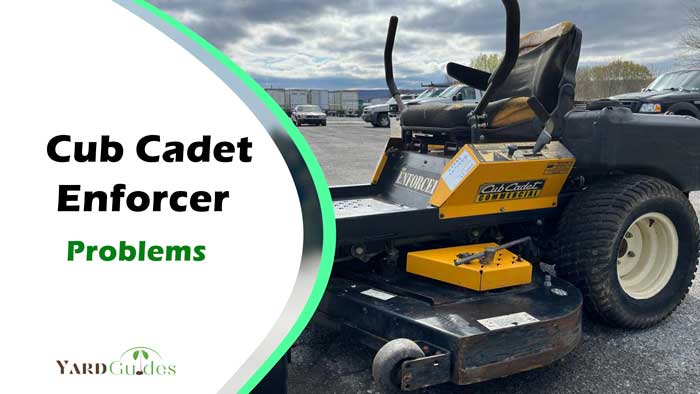
If you own a Cub Cadet Enforcer mower, you know how powerful and efficient this machine can be. However, like any other equipment, it can develop problems that interfere with its performance.
So what are the most common Cub Cadet Enforcer problems? The most common issues include-
- Overheating engines
- Hard starting
- Poor performance
- Slipping gears
- Noisy transmissions
- Stuck transmissions
- Dead batteries, etc.
Read on to learn more about these problems and how to fix them to keep your Cub Cadet Enforcer mower in top shape.
Here is a table showing your Cub Cadet Enforcer common problems with their quick solutions.
| Problems’ Category | Problems | Solutions |
| Engine Problem | Engine overheating | Check and replace the dirty air filter, check the oil level, and add more if necessary |
| Hard starting | Check and replace the clogged fuel filter and faulty spark plug | |
| Transmission Problems | Slipping gears | Check and add more transmission fluid. Replace the clutch if it’s faulty |
| Noisy transmission | Add more transmission fluid. Inspect and replace worn gears | |
| Stuck transmission | Add more transmission fluid. Replace the clutch if it’s defective | |
| Electrical Problems | Dead battery | Check and replace the dead battery. |
| Faulty ignition switch | Replace the ignition switch | |
| Blown fuses | Locate the blown fuse and replace it |
8 Most Common Cub Cadet Enforcer Problems: Guide To Fixing Them
Here are the most common problems your Cub Cadet Enforcer may undergo in detail. The problems have been divided into three groups. Issues related to the engine, transmission, and electrical problems.
1. Engine Problems
The engine is the heart of your Cub Cadet Enforcer mower, and when it develops problems, it can affect the entire machine. Some of the most common engine problems include:
a) Overheating
If your mower’s engine is overheating, it can be due to various issues, such as a dirty air filter, low oil level, or a malfunctioning thermostat. Some signs of an overheating engine include:
- Engine temperature gauge reading hot
- Steam or smoke coming from the engine
- Loss of power, and poor performance
Solution
Check the air filter and replace it if it’s dirty. You should also check the oil level and add more if necessary. Here is how to replace the air filter:
Step 1: Turn off the engine and let it cool down completely before attempting to replace it.
Step 2: Locate the air filter housing, which is typically located on the side or top of the engine.
Step 3: Remove the air filter cover by using a screwdriver or wrench to loosen and remove the bolts or clips that secure it in place.
Step 4: Carefully remove the old air filter from the housing and dispose of it properly.
Step 5: Clean any debris or dirt inside the air filter housing using a soft-bristled brush or compressed air.
Step 6: Install the new air filter in the housing, ensuring it is properly aligned and securely in place.
Step 7: Reattach the air filter cover by tightening the bolts or clips.
Step 8: Start the engine and check whether the overheating issue has been resolved.
b) Hard Starting
You may find difficulties turning on your mower. This can be due to various issues, such as a clogged fuel filter, a bad spark plug, or a malfunctioning carburetor. There are several signs of a hard starting engine, including:
- Engine cranks slowly or not at all
- Engine sputters or stalls
- Engine backfires
Solution
- Check the fuel filter and replace it if it’s clogged. To replace the fuel filter,
- Step 1: Locate the fuel filter, which is typically located near the fuel tank.
- Step 2: Using pliers, carefully remove the old fuel filter from its housing. Be sure to have a container nearby to catch any spilled fuel.
- Step 3: Install the new fuel filter, ensuring it faces the correct direction.
- Step 4: Secure the new filter with the clamps or screws provided. Finally, turn the engine on and check for any leaks.
If everything looks good, the fuel filter replacement is complete, and you should see an improvement in the engine’s starting performance.
2. Transmission Problems
The transmission transfers power from the engine to the wheels. When it develops problems, it can affect the entire machine. Some of the most common transmission problems include:
a) Slipping Gears
Slipping gears is one of the biggest transmission problems. It can be due to various issues, such as low transmission fluid, a malfunctioning clutch, or worn gears. Slipping gears can cause your mower to lose power and run inefficiently. Some signs of slipping gears include:
- The engine revs, but the mower doesn’t move
- Mower moves slowly or sluggishly
- Transmission slips out of gear
Solution
Check the transmission fluid level and add more if necessary. To check the transmission fuel level,
- Locate the transmission fluid dipstick, usually located near the engine.
- Remove the dipstick, wipe it clean, and reinsert it into the dipstick tube.
- Then, remove the dipstick again and check the fluid level indicated on the stick. The fluid level should be between the “Add” and “Full” marks on the dipstick.
If the fluid level is low, add more fluid to the transmission using a funnel to prevent spills. Make sure to add the correct type of transmission fluid recommended by the manufacturer.
b) Noisy Transmission
It can be due to various issues, such as low transmission fluid, worn gears, or malfunctioning transmission mounts.
Some signs of a noisy transmission include:
- Grinding, whining, or clunking noises from the transmission
- Transmission slipping out of gear
- Difficulty shifting gears
Solution
Check the transmission fluid level and add more if necessary. Use the procedure used to fix “slipping gears.”
Sometimes this may not solve the problem. In this case, you will have to replace the transmission mount. To do this,
- Step 1: Disconnect the negative battery cable to avoid electrical hazards.
- Step 2: Next, locate the transmission mount and use a jack to raise the transmission slightly.
- Step 3: Remove the bolts securing the mount to the chassis and transmission, then remove the old mount.
- Step 4: Install the new mount by aligning it with the bolt holes on the chassis and transmission.
- Step 5: Tighten the bolts securely and lower the jack.
- Step 6: Finally, reconnect the negative battery cable and start the engine to test the new mount.
c) Stuck Transmission
Having a stuck transmission can be due to various issues, such as low transmission fluid, a malfunctioning clutch, or a damaged transmission linkage. Some signs of a stuck transmission include:
- Mower won’t move forward, or backward
- Transmission slips out of gear
- Grinding or clunking noises coming from the transmission
Solution
Check the transmission fluid level and add more if necessary.
3. Electrical Problems
Electrical problems can be the most frustrating and challenging to diagnose and fix. Some of the most common electrical problems with Cub Cadet Enforcer mowers include:
a) Dead Battery
A dead battery is one of the most common electrical problems. It can happen due to various issues, such as a faulty alternator, a bad battery connection, or a drained battery. A dead battery can prevent your mower from starting altogether. Some signs of a dead battery include:
- The engine won’t start
- Lights won’t turn on
- Clicking sound when you turn the key
The Fix
You will need to replace your dead battery. Before starting, ensure the engine is off, and the key is removed from the ignition. Wear protective gloves and eyewear to prevent injury.
- Step 1: Locate the battery. The battery on a Cub Cadet Enforcer is typically located under the seat, towards the rear of the mower. Some models may have the battery in a different area, so consult the owner’s manual to confirm the location.
- Step 2: Remove the battery cables. Using a wrench or pliers, loosen the nut on the negative (-) battery cable first, then remove the cable from the battery post. Repeat this process for the positive (+) cable.
- Step 3: Remove the battery. Depending on the model, the battery may be secured in place with a bracket or strap. Loosen the bracket or strap and carefully remove the battery from its compartment.
- Step 4: Install the new battery. Place the new battery in the compartment and secure it with the bracket or strap. Be sure to place the battery in the same orientation as the old battery, with the positive (+) and negative (-) posts in the correct positions.
- Step 5: Connect the battery cables. Attach the positive (+) cable to the positive battery post, and tighten the nut with a wrench or pliers. Repeat this process for the negative (-) cable.
- Step 6: Test the battery. Turn on the ignition and start the mower to ensure the battery is installed correctly and properly.
b) Faulty Ignition Switch
If your mower’s ignition switch is faulty, it will prevent the engine from starting or cause it to shut off unexpectedly. Some signs of a faulty ignition switch include:
- The engine won’t start
- The engine starts but then shuts off
- The engine won’t turn off.
The Fix
To fix this problem, you should replace the ignition switch.
- Step 1: Remove the ignition switch assembly from the mower by unscrewing the screws that secure it.
- Step 2: Once the assembly is free, disconnect the wiring harness by unplugging it from the switch.
- Step 3: To install the new ignition switch, simply connect the wiring harness to the new switch and screw it into place on the mower.
c) Blown Fuses
If your mower’s fuses are blown, it can prevent the engine from starting or cause electrical components to stop working. Various issues, including electrical shorts and power surges, can cause blown fuses. Some signs of a blown fuse include:
- Electrical components won’t work
- The engine won’t start
- Lights won’t turn on.
The Fix
To fix this problem, you should first locate the blown fuse and replace it with a new one. In general, the fuse can be found in the electrical system of the mower, which is typically located under the hood or near the battery compartment. Here is a YouTube video showing how to do it.
Tips To Prevent Cub Cadet Enforcer Issues
When it comes to Cub Cadet Enforcer issues, prevention is always preferable to cure. Here are some tips to help you avoid problems:
Perform Regular Maintenance
Regular maintenance, such as oil changes, air filter replacements, and blade sharpening, can help prevent problems. Specific maintenance instructions and recommended schedules can be found in your owner’s manual.
Keep The Mower Clean
A clean mower is less likely to have issues. After each use, clean your Cub Cadet Enforcer with a pressure washer or hose.
Park The Mower in a Proper Place
While not in use, put your Cub Cadet Enforcer in a dry, sheltered area. This will help to prevent corrosion and other problems. Allowing the mower to sit outside in the elements can cause harm to the engine and other components.
Use High-Quality Fuel
Always use high-quality fuel in your Cub Cadet Enforcer mower. Low-quality fuel can cause engine issues such as carbon buildup and blockage.
Avoid Cutting Wet Grass
Cutting wet grass can cause clumping and clogging of the mower deck, leading to damage and other problems. Wait till the grass is dried before mowing.
Conclusion
As you can see, several common problems can affect the performance of your Cub Cadet Enforcer mower. By identifying these Cub Cadet enforcer problems early and taking the necessary steps to fix them, you can keep your mower running smoothly and efficiently for years.
If you’re uncomfortable diagnosing or fixing these problems, take your mower to a qualified technician for assistance. By the way, keep regular maintenance to prevent most of the issues.