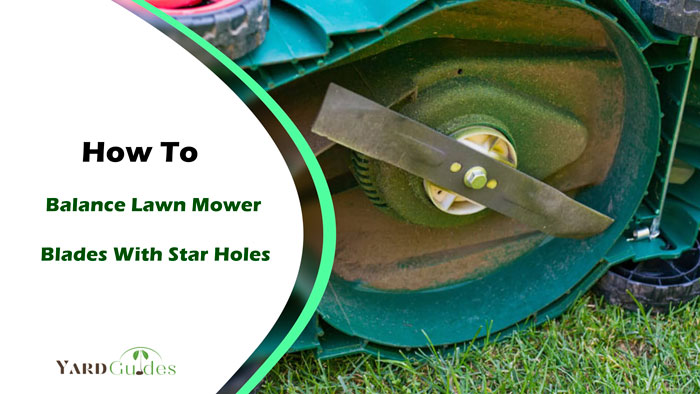
Most lawn mower blades have round center holes, making them easy to balance using the nail or screwdriver trick method. However, some blades have 5, 6, or 7-star holes.
So then, how do you balance these lawn mower blades with star holes? Similar to blades with round center holes, you can balance your lawn mower blades with star holes using a nail or screwdriver. However, this method only works for blades with 5 or 7-star holes. Because one of the holes is indexed. To balance 6-star blades, you will need a drill bit and vise.
Read on to learn more about the steps on how to balance lawn mower blades using star holes. We will also cap the need for balancing the lawn mower blades.
Methods of Balancing Lawn Mower Blades With Star Holes Table
Below is a quick overview of the different methods available for balancing lawn mower blades with star holes.
| Types of Star Hole Blades | How To Balance |
| 5 or 7 Star Holes | Clean and sharpen the blade. |
| Clamp a nail or screwdriver on a vise or set a cone balancer on a leveled table. | |
| Position the blade on the cone balancer, nail, or screwdriver via the hole at the perpendicular rate level. | |
| If a side sits lower than the other, grind it down until both sides are at level. | |
| 6 Star Holes | Remove, clean, and sharpen the blade. |
| Set up a 3/16-inch drill bit onto a vise. | |
| Position the blade on the drill bit through one of the star holes, ensuring it barely touches down. | |
| Rotate the blade and place it on the drill bit via the directly opposing star hole. |
How To Balance Lawn Mower Blades With Star Holes
Lawn mower blades with star holes come in three popular types, including 5-star, 6-star, and 7-star. Below is a step-by-step guide on how to balance these blades.
Method 1: Balancing Lawn Mower Blades With 5- or 7-Star Holes
Unlike 6-star hole blades, those with 5 and 7-star holes have one of their holes indexed or at a perpendicular rate level. Here is how to balance them.
Step 1: Remove and Clean the Blades
With the lawn mower unplugged, remove the blade from the unit, and clean off any debris or gunk on it.
Step 2: Get a Balancer and Set It Up
Here, you can get a nail, screwdriver, or even a regular metal or plastic cone balancer. Then, clamp your nail or screwdriver onto a vise. Alternatively, you can set the nail on the wall. If using a cone balancer, set it up on a leveled table.
Step 3: Set your 5 or 7-Star Hole Blade
Next, set your blade on the nail, screwdriver, or cone through the indexed hole. Let the blade rest and observe which side sits slightly lower or is heavier than the other.
Step 4: Grind the Blade Further
Grind the side that sits slightly lower to remove some bits of the blade material. Then, place the blade again on the nail, screwdriver, or cone balancer for balancing.
Repeat the process until both blade sides are at a level on the balancer before assembling it on your lawn mower.
Method 2: Balancing Lawn Mower Blades with 6-Star Holes
To balance a lawn mower blade with 6-star holes, you only need a 3/16-inch drill bit and vise.
Step 1: Clean and Sharpen the Blades
Remove the blades from the lawn mower and clean them. Then, sharpen the blades according to your needs.
Step 2: Clamp the Drill Bit
Get your drill bit and clamp it securely into your vise. Make sure to place the vise on a leveled table or workbench.
Step 3: Position your Blade
A lawn mower blade with 6-star holes has opposing holes. So, mark two opposing star holes so that one will be for one end of your blade. The other marked hole should be for the other end of the blade.
Then, place your blade on the drill bit through one of the marked star holes. Next, adjust the blade position in the vice up and down, ensuring it narrowly touches one end on the surface. Simply put, the blade should hover.
Step 4: Rotate the Blade
Next up, remove the blade from the drill bit, and rotate it to the opposite side. Make sure to set it up through the other marked star hole.
If it sits at approximately the same position, it is balanced. But if not, you may have to shave off some metal on the edge with too much weight until it is leveled.
The following is the balancing instructions and a must-watch video on how to do it:
Why Balance Lawn Mower Blades With Star Holes?
The following are some of the reasons you may need to balance your lawn mower’s blades with star holes.
Prolongs Mower’s Life
Your lawn mower’s blades can spin at approximately 3000 RPMs. Because of the high spinning speeds, some of the mower’s components may get damaged because of unbalanced blades. Balancing the edges can help extend the life of your machine.
Ensures Even Cuts
Additionally, keeping your lawn mower blades sharp and balanced ensures even cutting every time. Therefore, you don’t have to worry about ending up with grass with torn edges.
Reduces Vibrations
With imbalanced lawn mower blades, you may have to deal with excessive vibrations, which can be annoying. Balancing the blades helps eliminate the vibrations, making it easier to mow.
How Often Should You Balance Lawn Mower Blades?
It would help if you balanced your lawn mower blades every time after sharpening them. This is because you remove some metal every time you sharpen the edges. Consequently, this leads to blade imbalance.
Additionally, you should balance your lawn mower blades as soon as you hear higher vibration levels. Or when the edges start making uneven cuts despite being sharp enough.
Conclusion
Whether you have 5, 6, or 7-star hole lawn mower blades, the process of balancing them is straightforward. You only need the right tools, including a vise, nail, screwdriver, cone balancer, or drill bit. This depends on the blade you have.
Of course, there are several benefits to balancing your lawn mower blades, including more extended durability, even cuts, and reduced vibrations. That said, the best time to perform the balancing is every time you sharpen the blades. But for new blades, you may not need to balance them.